Today I’m excited to show you how to build a basic graham cracker house. Decorating these gingerbread houses is a family tradition for more than 20 years. It’s so easy and so much fun! 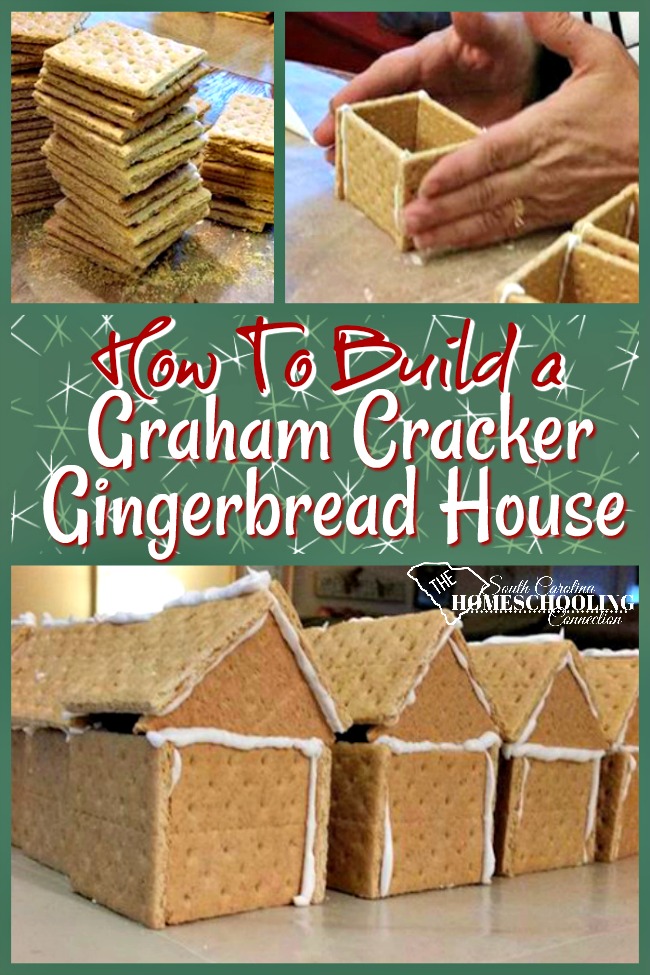

The cracker houses look like little outhouses or doghouses…but, they turn out so cute when they’re decorated. And it’s just the right size for one person–no matter what age.
Older kids and adults can get detailed about their decorations. Younger ones can be more random about it and may lick or bite their candies that go on the house. All the better for each to have their own.
This process can be adapted to any number of participants. I’ve done five houses at a time…up to 150 houses at a time. We have done decorating parties for just our family. For my kids and their friends. For a class at school or homeschool co-op. And also for our entire homeschool support group!
Here’s how you can build a basic graham cracker house for your own crew. Prepare the houses several hours (or even days) ahead to allow for drying time. The royal icing is like an edible hot glue so the houses will be very stable when the decorations are added.
Step 1: Gather Supplies
Make Royal Icing Recipe: 1 lb. box of powdered sugar, 3 Tbsp meringue powder, 5 Tbsp lukewarm water. Mix all together at medium-high speed for 7-10 minutes till peaks form. Add a 1/2-1 tsp of water for softer consistency. Yields: about 3 cups
This recipe is on the meringue powder container. So don’t worry about writing it down…just get the meringue powder. A single recipe will be enough to build a bunch of houses. A double recipe would make a slew of them. For now, we are just making enough icing to build the houses.
Graham crackers: Each house needs seven cracker squares. I can get about seven houses out of one box of crackers (allowing for a few broken crackers).
You’ll also need waxed paper, serrated knives, Decorator icing bags, paper plates, extra helpers too
Load 1/2 cup of royal icing into the decorating bag. Set out waxed paper placemats. Be sure you and all your helpers have washed hands.
 Step 2: Assembly Line
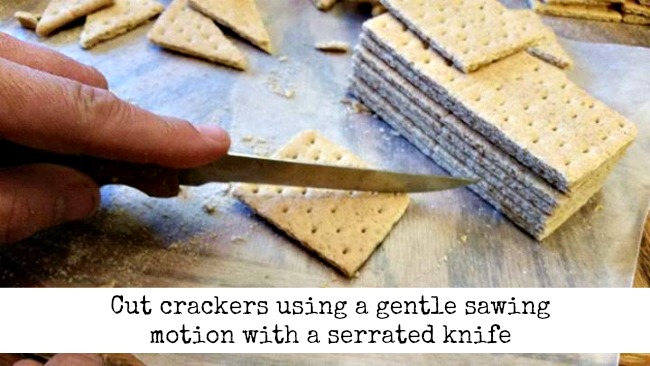
Basic shapes: Some graham crackers are packaged in squares. Others are in rectangles (double wide squares). If your crackers are the double-wide rectangles, cut squares from the rectangles. Also, cut some of the squares diagonally, corner to corner for triangles.
You’ll need six squares and two triangles for each house.
Use a gentle sawing motion with a serrated knife. Don’t press too hard or you’ll crush the cracker. Once you have sawed a line, you can snap it apart on that score.
Repair broken crackers: Some crackers will be broken when you open the box, You can repair broken crackers by “gluing” them together with icing. Lay them flat to dry a bit before constructing with them. Especially for the rooftop pieces.
Don’t worry about the cracks. Candy decorations will cover them later.
Alignment line: The square crackers are not quite truly squares. Notice there is a line in the square. I recommend aligning that horizontally. For triangle shapes, stack them up to align the longer sides (rotate or flip them to match).
Construct walls: Set out four square crackers for the walls. Pipe icing along the inside edges of two of the crackers. Stand one of these icing-prepped crackers as the side wall. Stand one of the uniced crackers at a 90 degree angle, sticking the end of the outer edge into the icing. The two walls form the first corner and should prop up on their own.
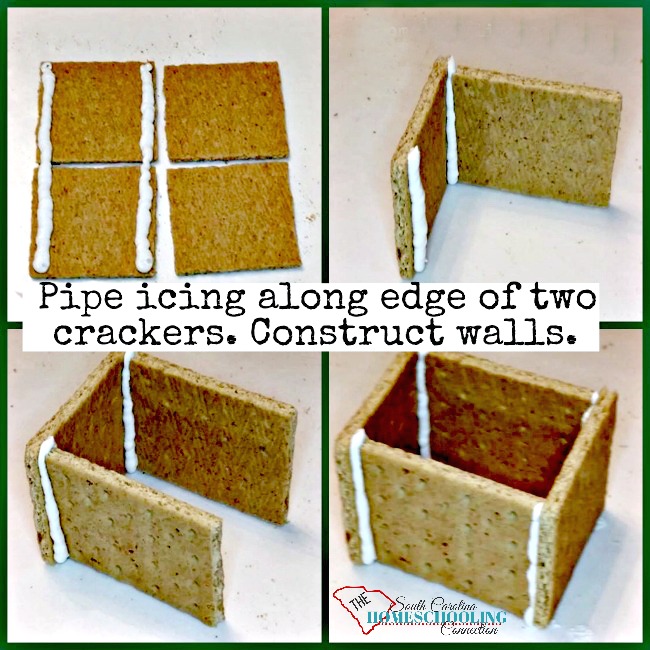
Stand the other uniced cracker as the third wall, forming the second corner. Attach the fourth wall where the piped icing will attach to complete the remaining corners.
Press the two side walls to straighten up the corners. This configuration is secure enough to pick up or move it out of your way to work on the next set of walls.
Construct roof: Stack triangles to find two that are similar size. Align the longer sides so the roof will fit together properly.
Set out two square crackers. Pipe the icing along the edges, just like we did for the walls. Stand the edge of the triangles at a 90 degree angle, sticking into the piped icing of one cracker. Attach the remaining roof piece to the opposite edges of the triangles.
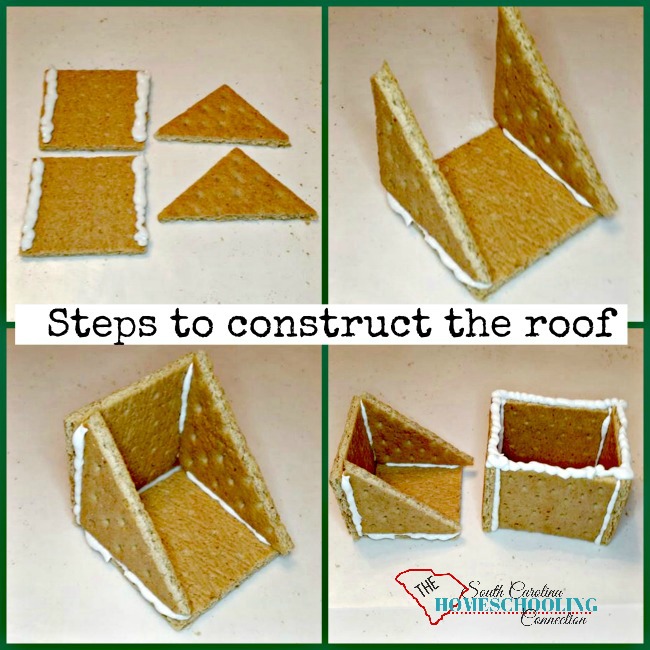
The corner where the two squares meet is the top of the roof. This roof piece should be stable enough to pick up. Pipe icing along the top edge of the wall-unit. Affix the roof unit. Fill the seam along the top of the roof with another pipe of icing.
Affix to plate: Pipe a line of icing along the bottom outer edge of the wall pieces
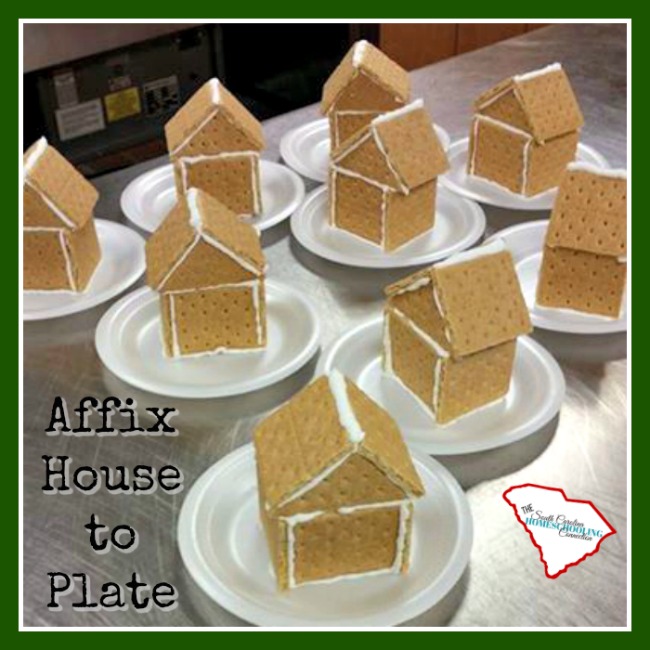
Drying time: Allow time for the houses to dry before adding candy decorations. At least an hour. There is probably enough royal icing left over to use for the decorations. But, if you wait longer that 2 days, the icing separates. So you need to rebeat it to make is fluffy again.
Prep for a Larger Group
Plan to assemble at least several days prior to the event. You don’t want to be rushed trying to assemble on the day of the party. I have done it up to two weeks prior to the event, because that’s when I could rally a team of volunteers together.
Double the royal icing recipe and load an additional piping bags for your helpers. Have 1-2 helpers cutting squares/triangles. Other helpers will be working on assembly.
If you have enough help, then another person can move the assembled houses away from the work area. Set them on a shelf or table to dry.
Once the houses are dry, stack them in a box for transport to the party location. Affix the houses to the plates at that location.
Have you tried these Graham Cracker Houses?
Let me know in the comments
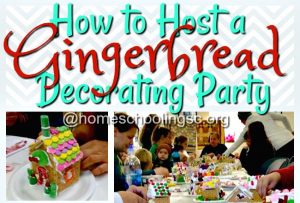
Read more about Hosting a Decorating Party:
Read more about Holiday Engineering Group Challenge:


 Holiday STEM Challenge
 Red Cross for Homeschool Youth Volunteers
 Homeschool Proms and Dances
 South Carolina Regions: A Glossary of Terms


Great idea! Our town holds a graham cracker gingerbread house decorating night at the local library but we have to go with a house base made out of milk cartons or a similar material to and then we “glue” gingerbread to the box using frosting… which makes the graham crackers pretty inedible in my opinion. Thanks for sharing with us at the Virtual Refrigerator. Pinned
Easy to do! Thanks for sharing this idea!
Hi! I am doing this for my sons kindergarten class! Any suggestions on the best way for the kids to take them home? Thank you!
Yay! What fun!
I recommend the participants have a box to carry home their project. I have this article about the “party” part of it–with a section on how to take home the decorated house.
https://www.homeschoolingsc.org/gingerbread-decorating-party/